
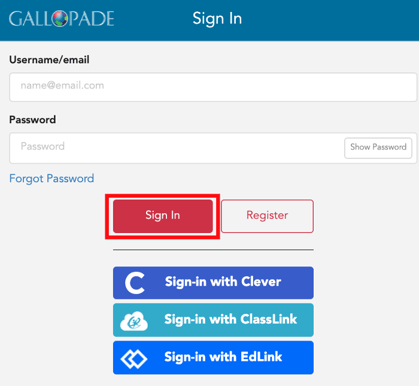
These instructions are for teachers whose districts do not use a single sign-on program such as ClassLink, Clever, or EdLink.
Teachers who log in by going to https://gallopade.content2classroom.com/signin and use the red sign in button will be able to add a class manually.
Steps for Adding a Class
1. Upon logging in, you will see your dashboard.

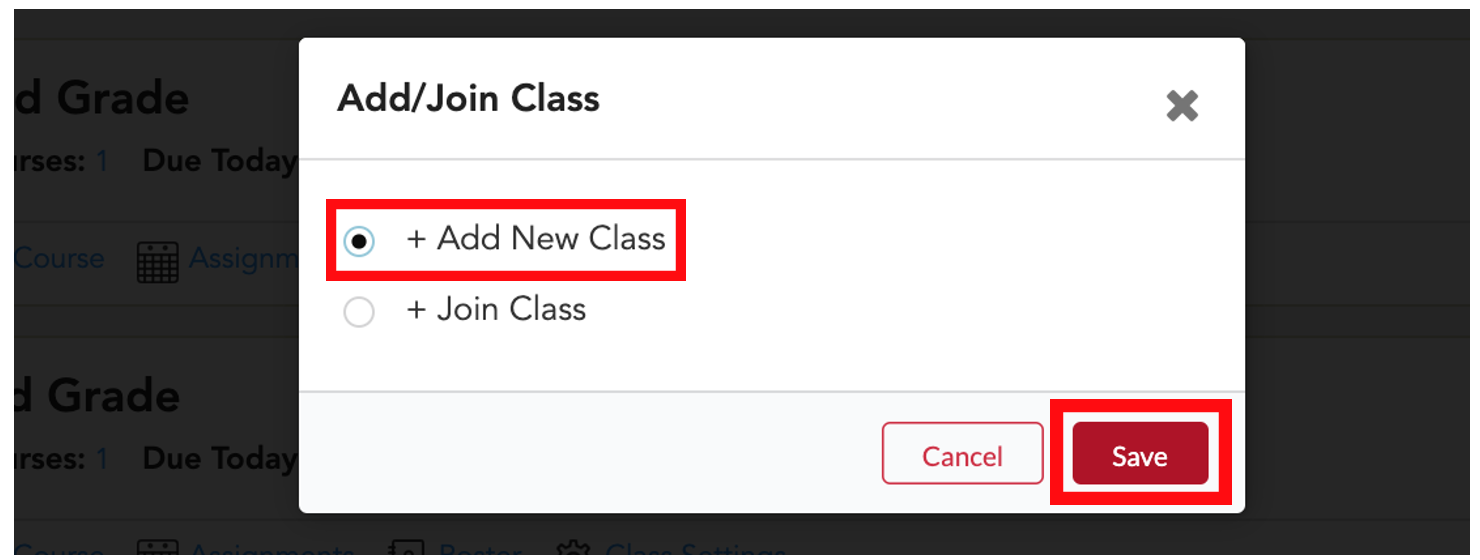
2. Select the red + Add/Join Class button in the upper right area of your dashboard.
 3. Select +Add New Class and Save.
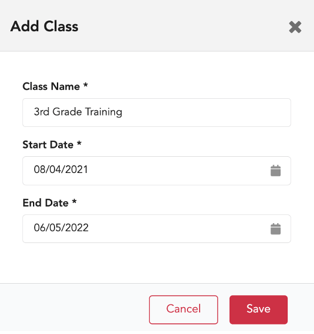
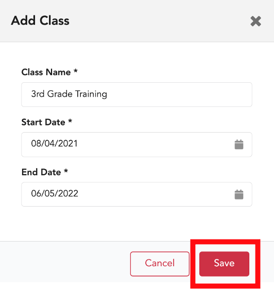
4. You will see an Add Class pop-up box with the required fields: Name, Start Date, and End Date.
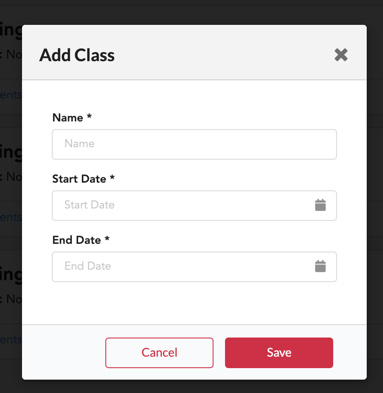
5. Fill out all fields.
NOTE: It is important to select an end date that is after the last day of school. So, if your last day of school is June 1st, it is important to select an end date that is AFTER June 1st. Also, if you wish to make assignments today, you must set the start date to yesterday.
6. Select Save.
7. Your class will appear on your dashboard.
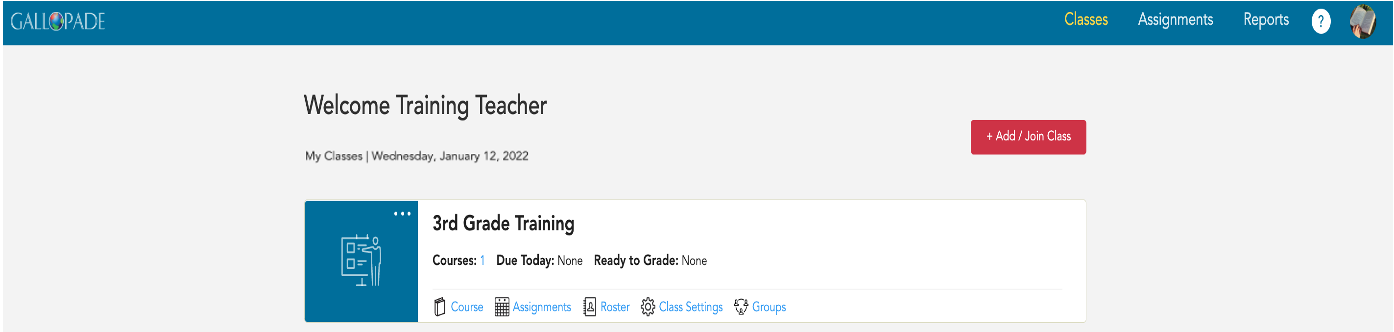
This needs to be completed for every class.
After creating a class, you will need to add the course by selecting the blue Course button. Please click here for step-by-step instructions on how to add a course a class.
Note: SSO customers will not create classes. SSO classes are created and managed by the SSO, but you can edit the name of your class(es). Click here to find out how to edit a class name.
Click here for instructions on how to add students.