How to Create an ExperTrack Item Bank and Add it to Additional Classes
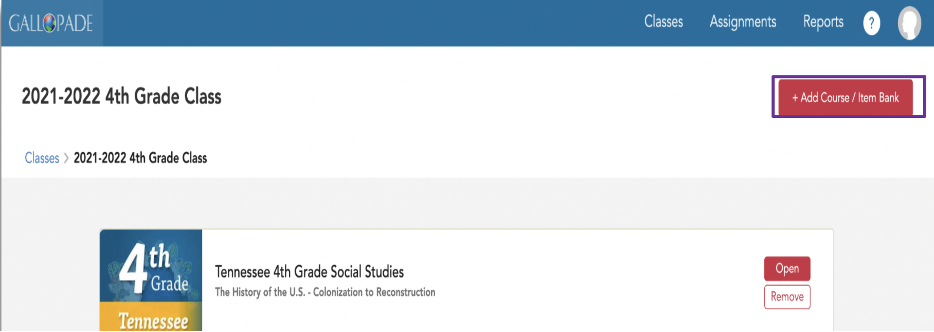
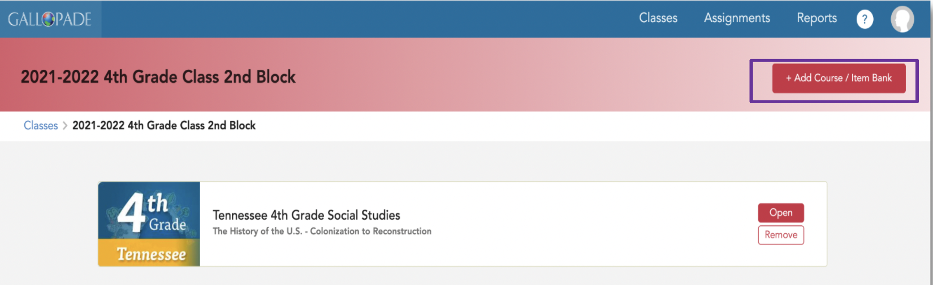
1. Select Course in blue text under the class name.
2. Select the red +Add Course/Item Bank button in the top right corner.
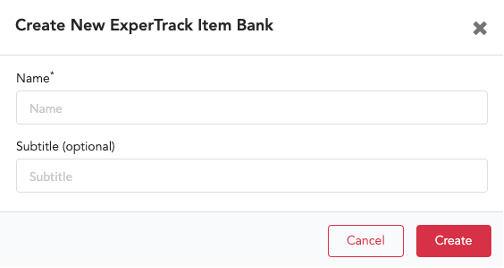
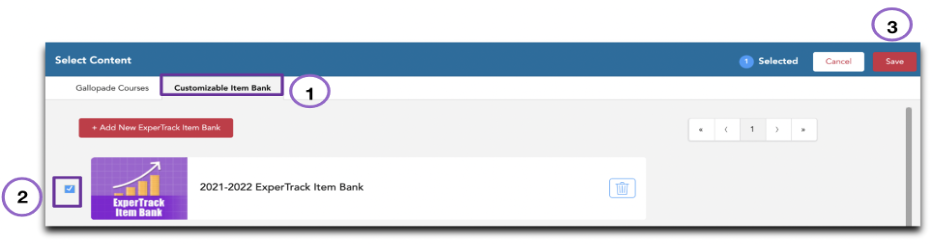
3. Select the Customizable Item Bank tab and then the red +Add new ExperTrack Item Bank.

4. Name the Item Bank and press Create. NOTE: You will be able to add this Item Bank to all of your classes.
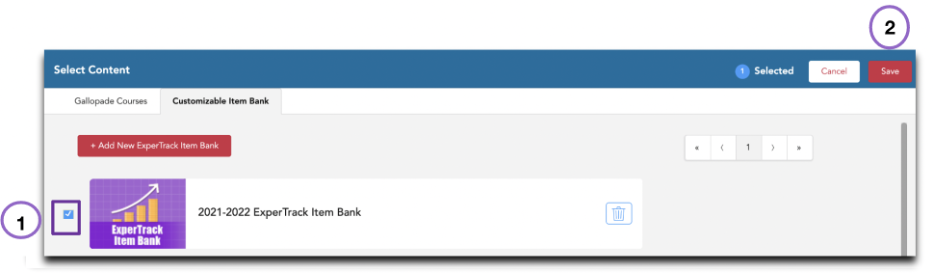
5. Now that you have created your Item Bank, select the checkbox to the left of your new ExperTrack Item Bank and press Save.
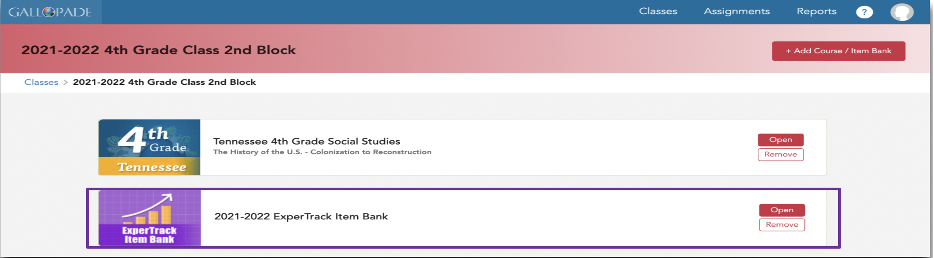
6. Once these steps are complete, you will see two courses in your class. The process of creating an ExperTrack Item Bank only needs to be completed once. After completing steps 1-5, you can add this item bank to additional classes. 
How to Add Your ExperTrack Item Bank to Another Class
1. Select Course in blue text under your class name.

2. Select the red +Add Course/Item Bank button on the top right corner.
3. Select the Customizable Item Bank tab from t the top left, then select the checkbox to the left of your existing item bank and press the red Save button in the top right corner.
4. This will add the item bank to the list of courses for the class.
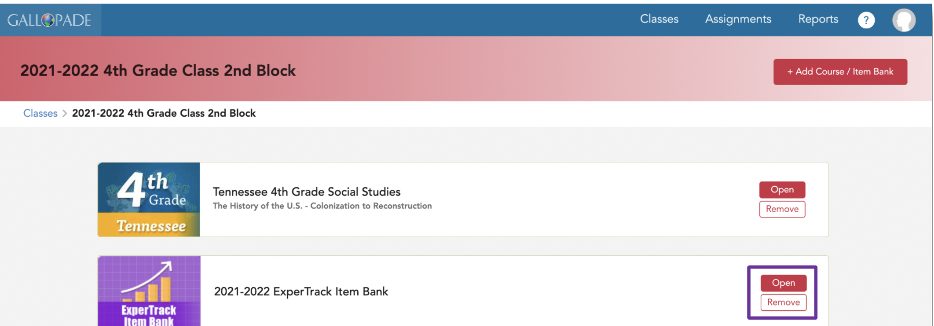
5. To start using this item bank, select Open in red to the right of the Item Bank name.

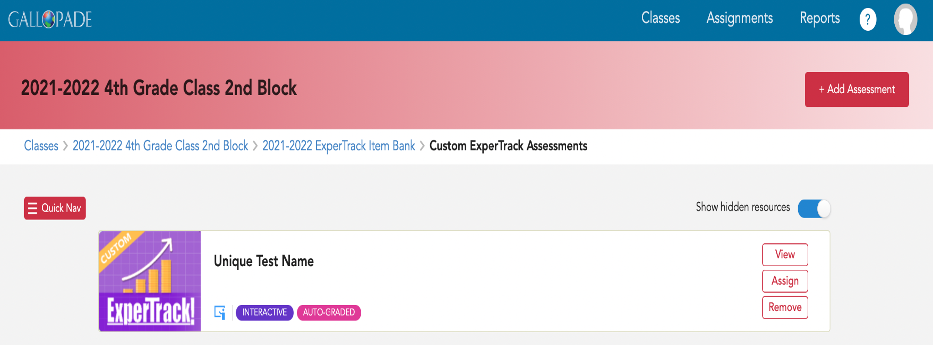
7. Here you will find previously created assessments and have the opportunity to create additional assessments.