
How to add and remove notations to Clickbook content screens
Users (both teachers and students) have the ability to add highlights and notes to Clickbook content screens. Here are the steps.
Adding a Highlight
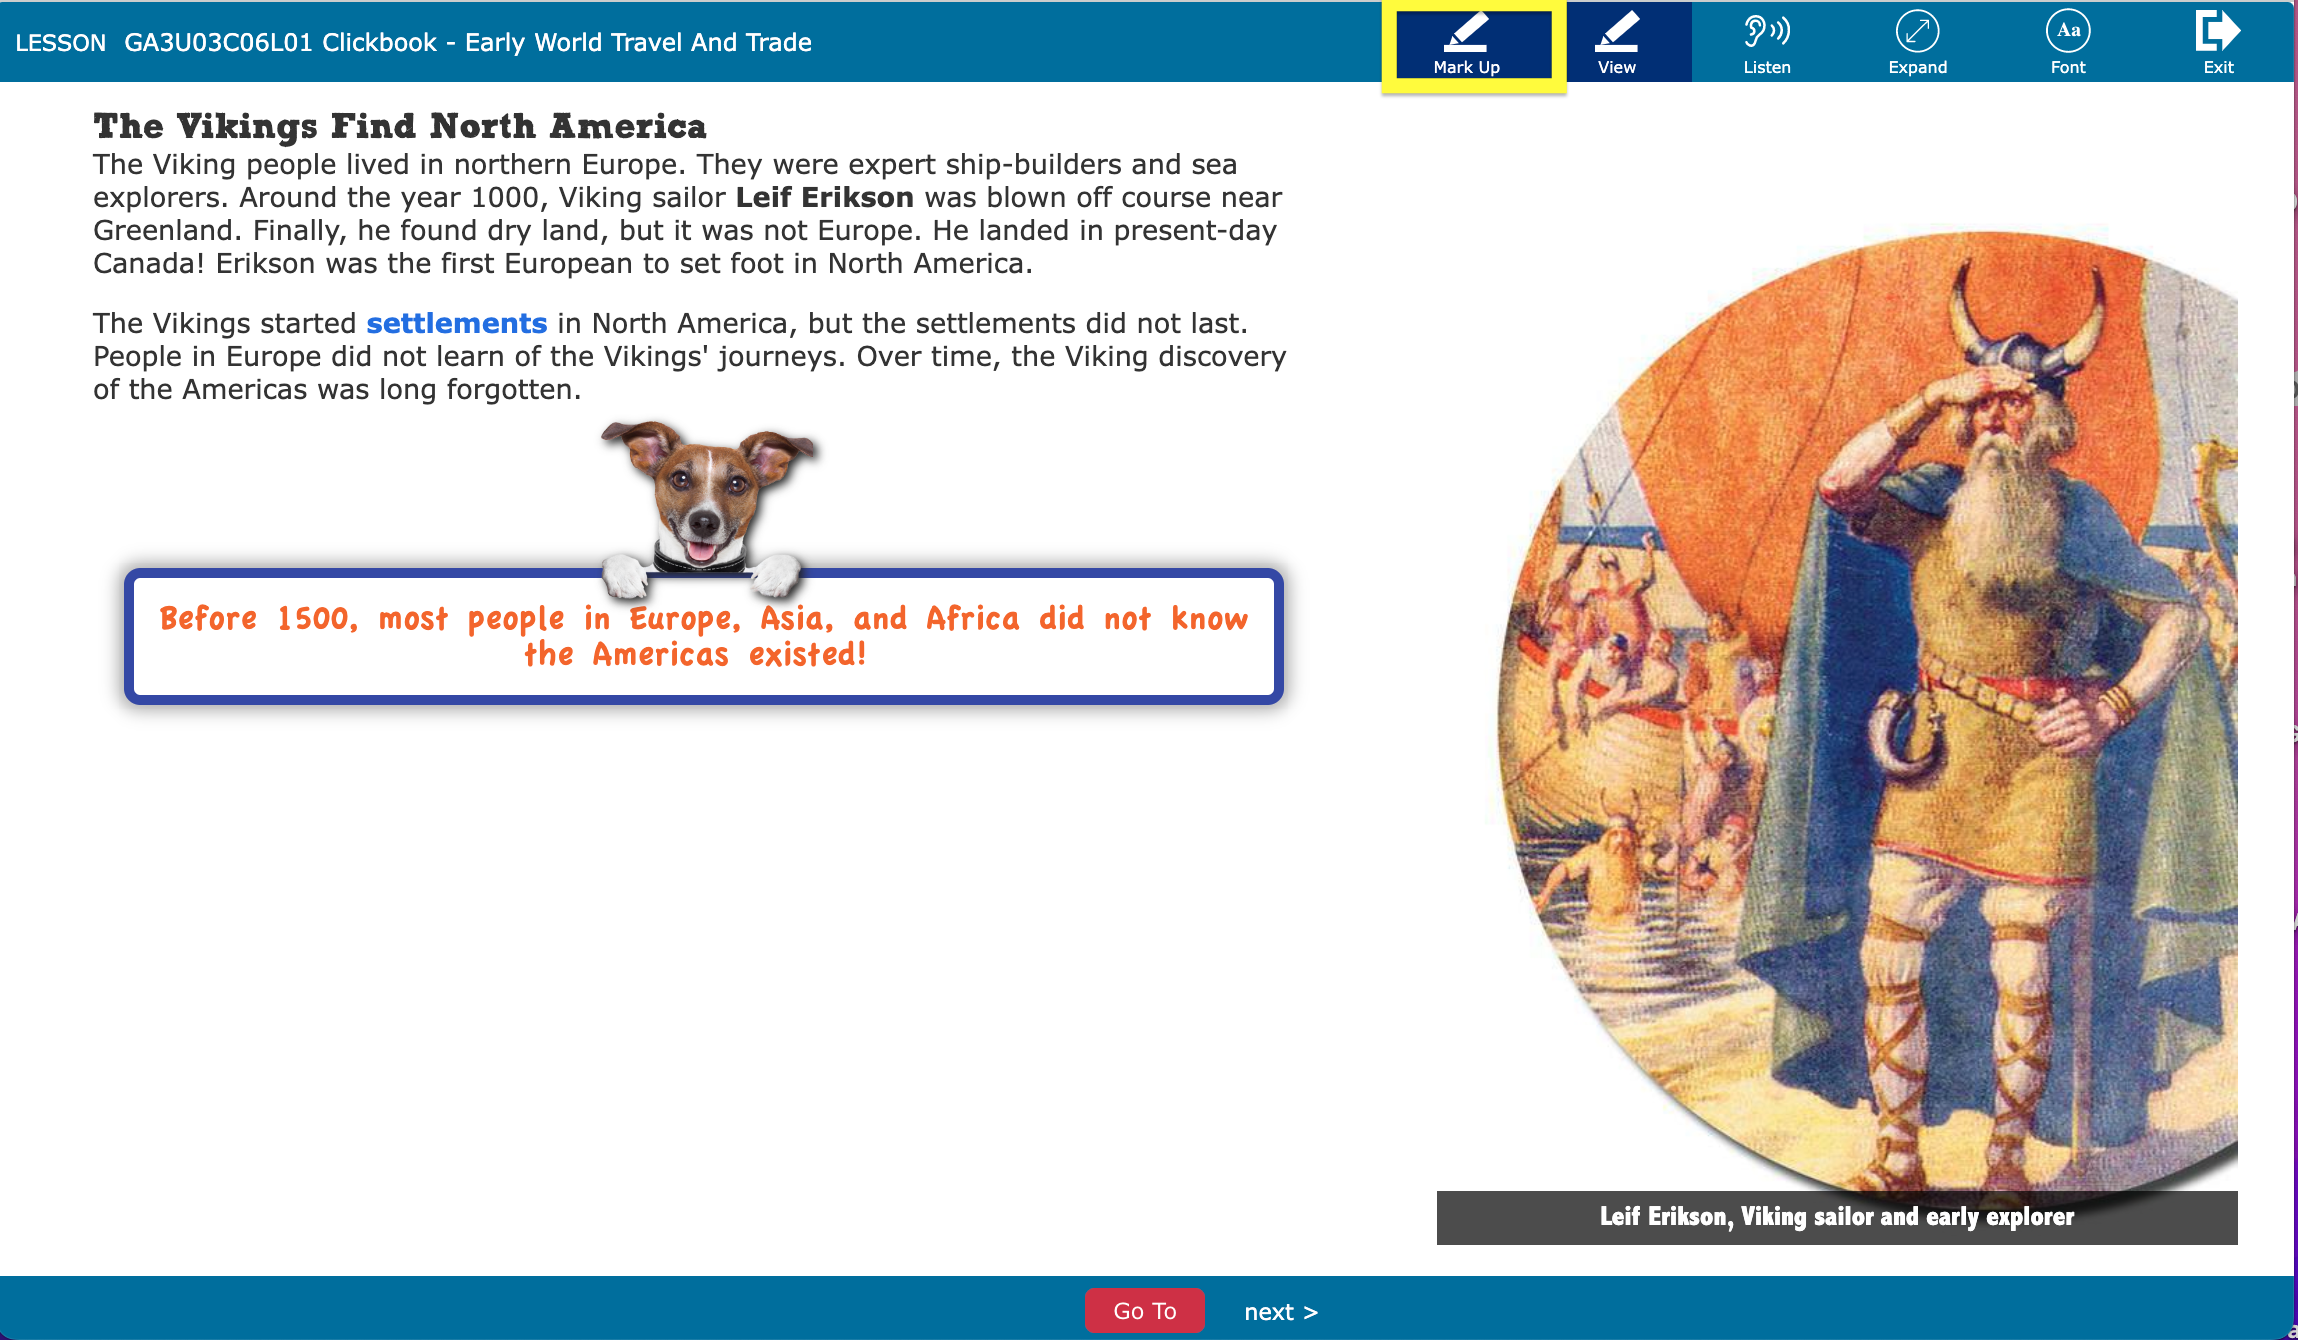
1. Open the desired Clickbook screen. Select the word, Mark Up.
2. Select the text to be highlighted by holding down the mouse and selecting the text.
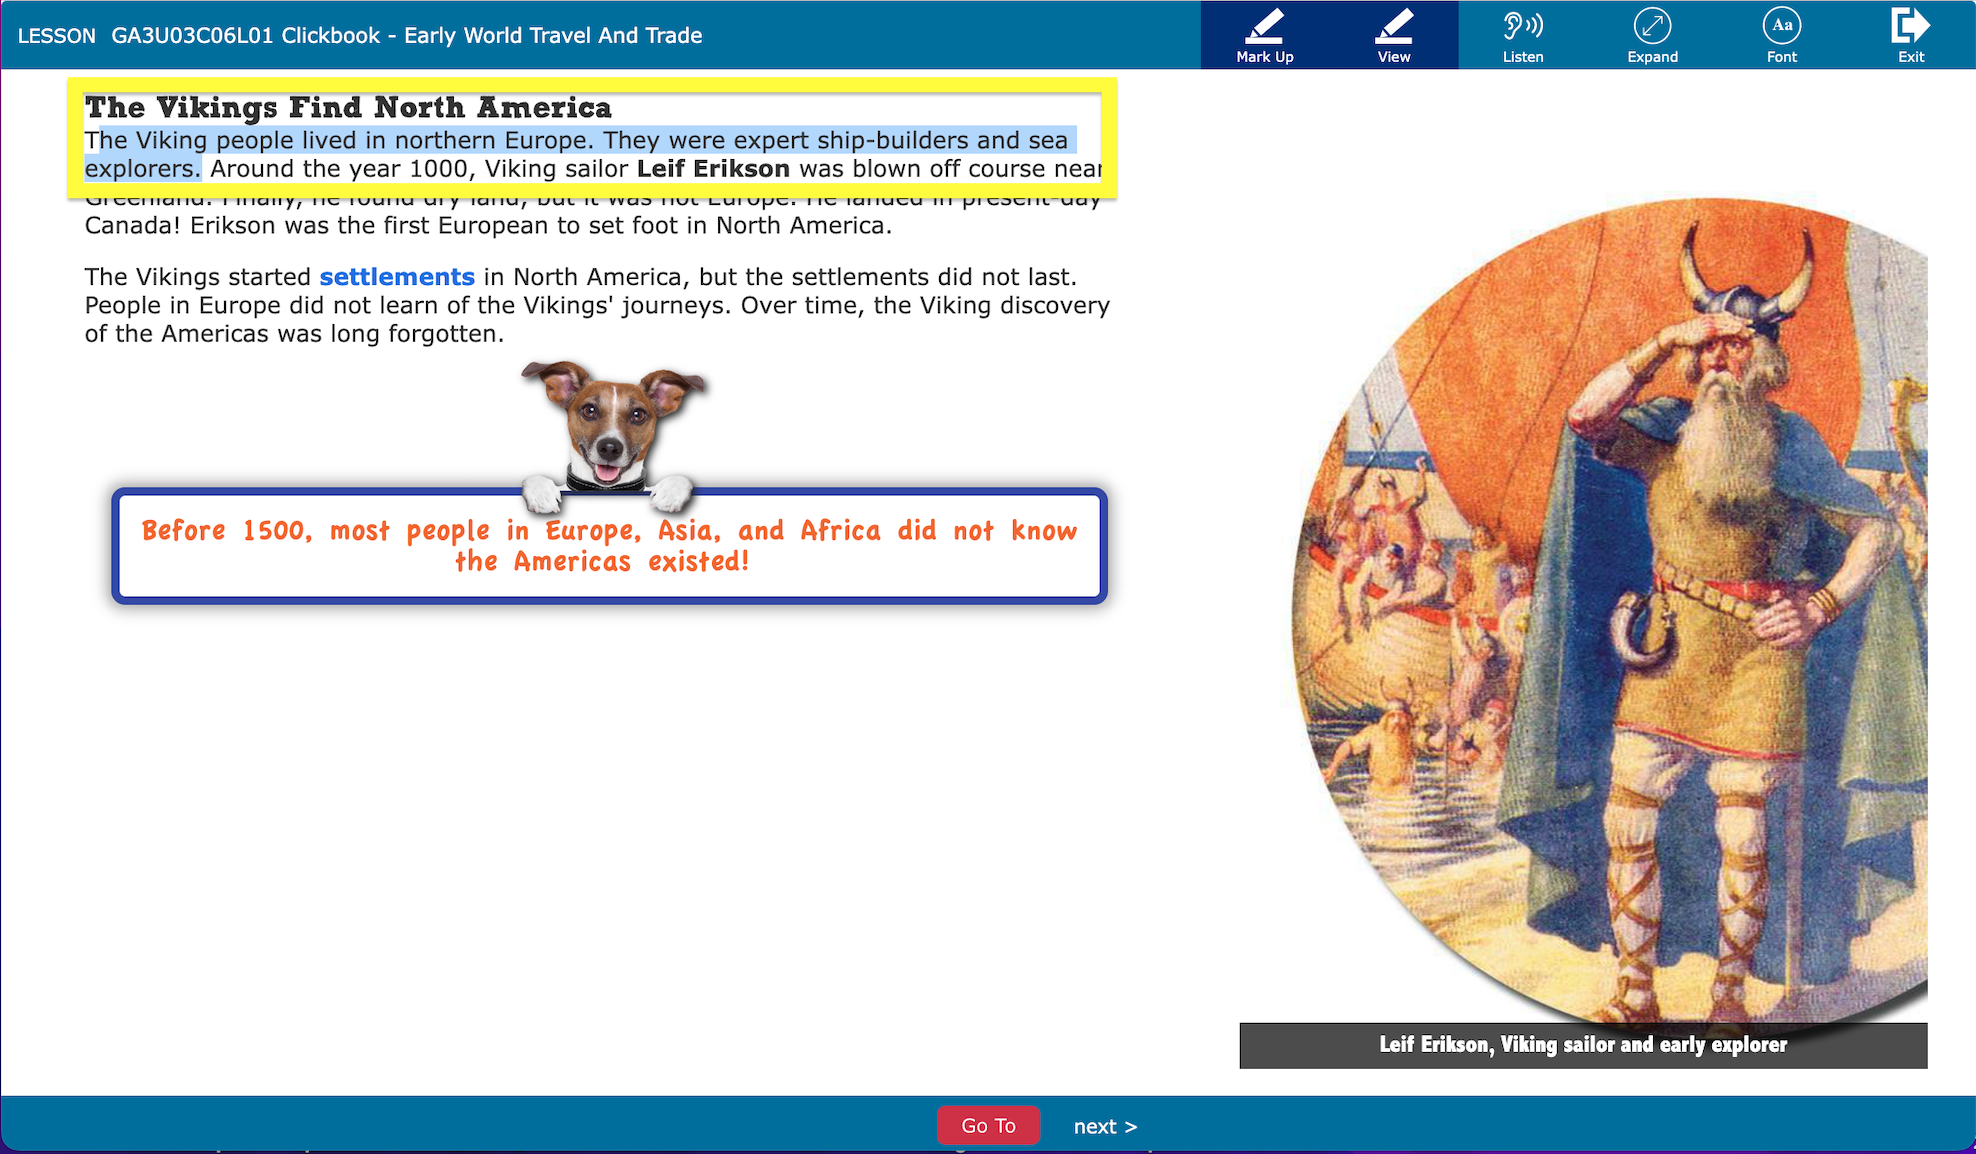
3. A highlight will automatically be added to that section of text.
Changing the Color of the Highlight
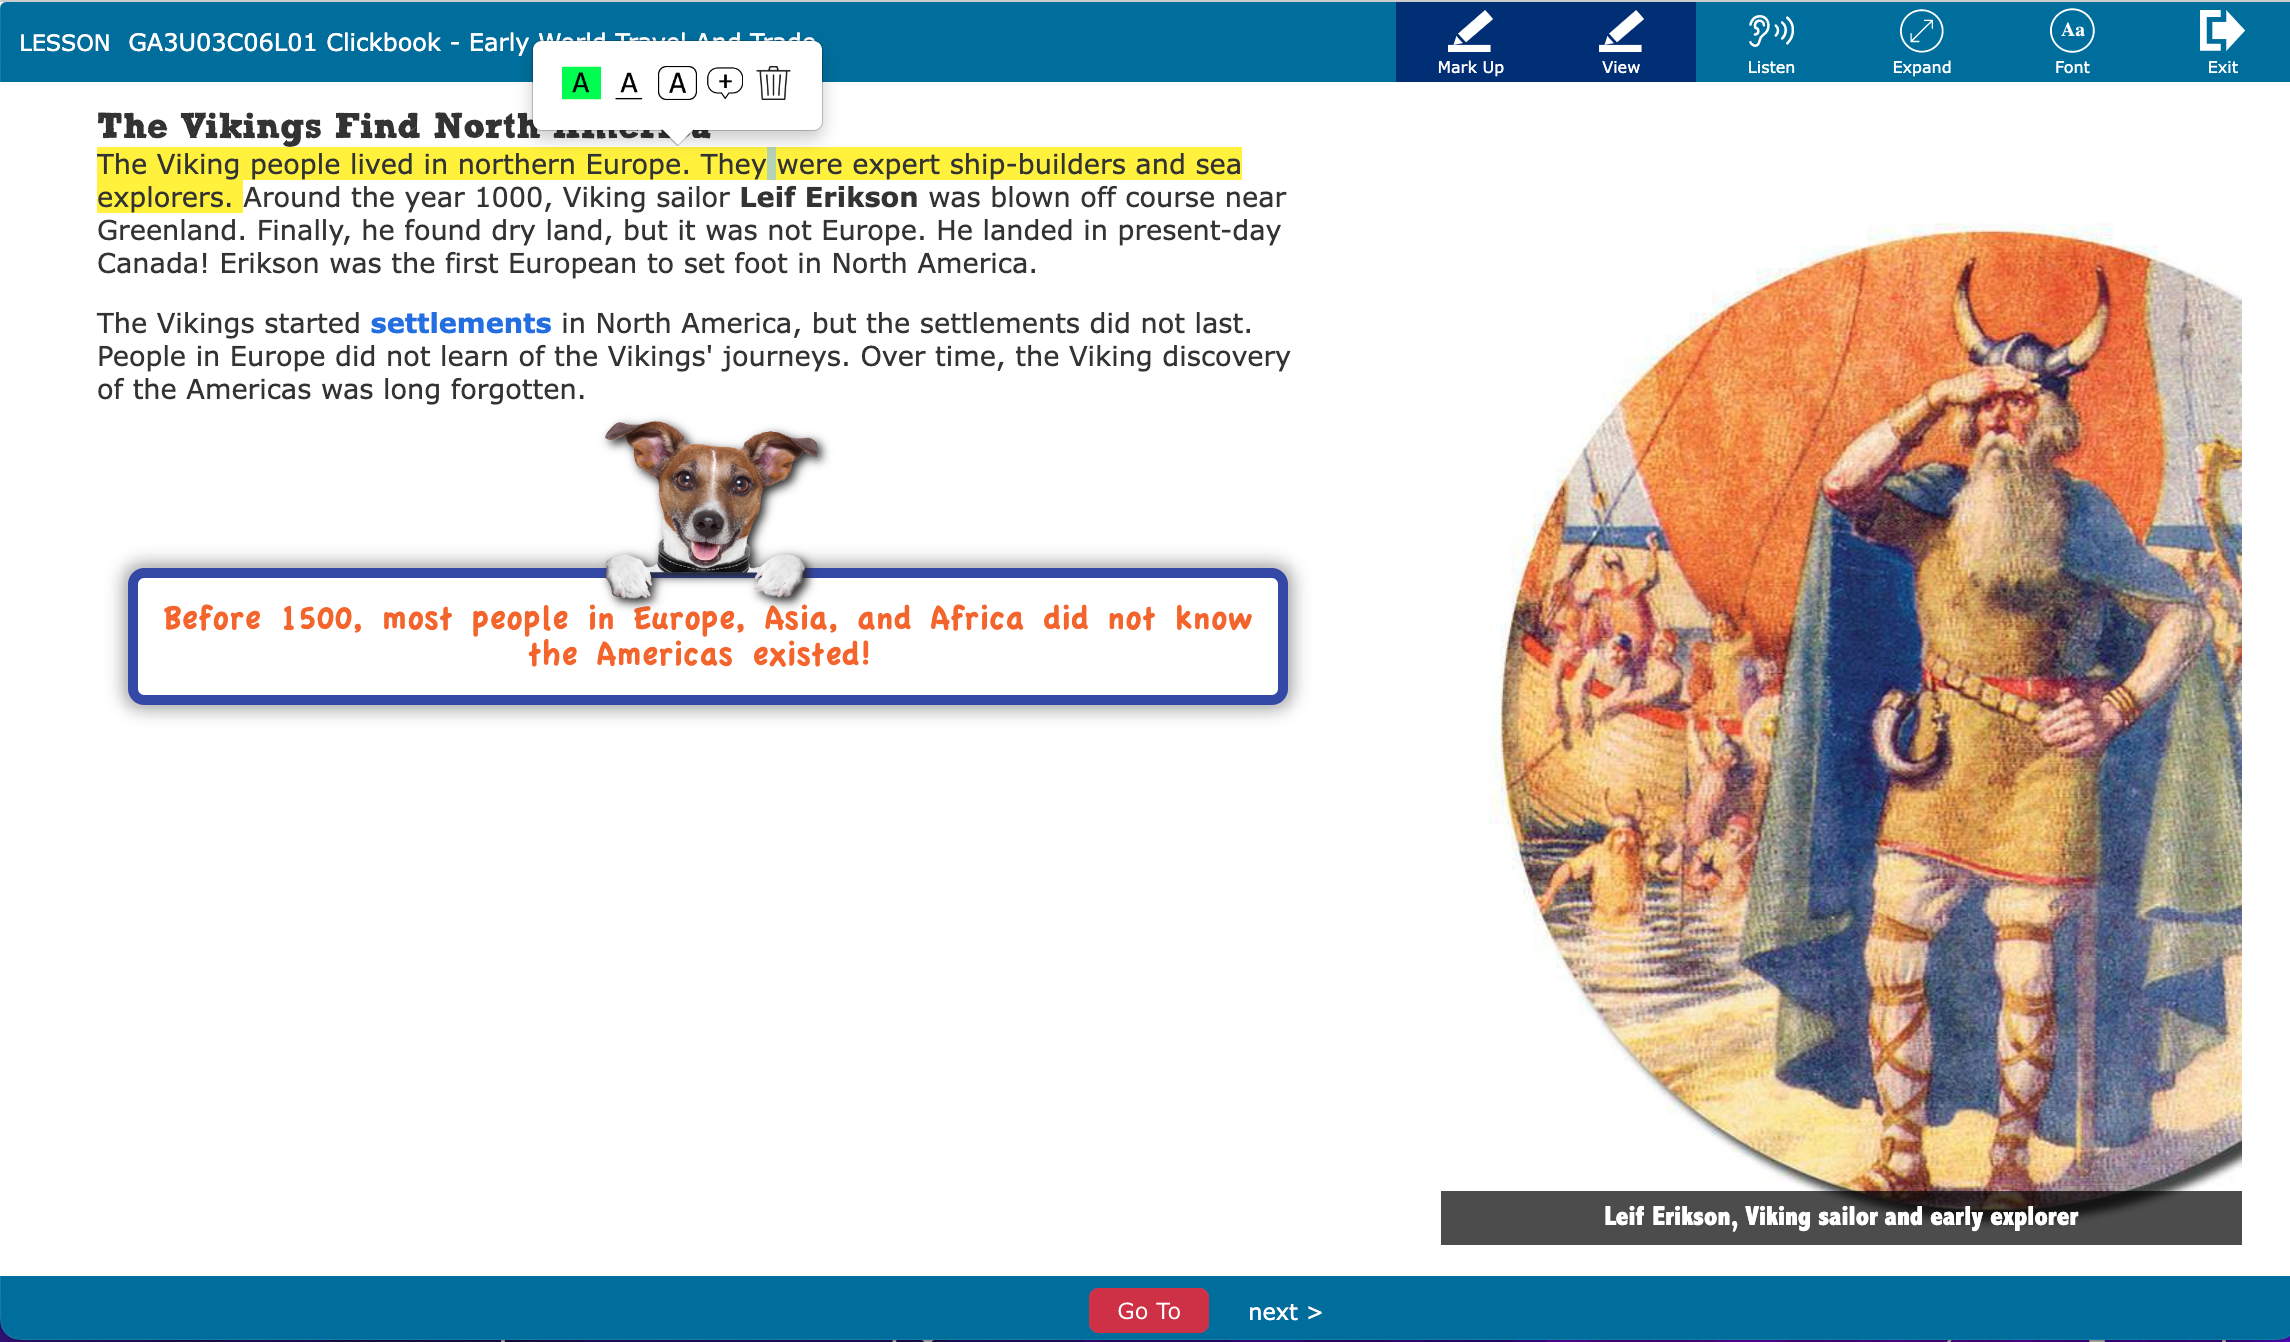
Once added, users can change the color of the highlight by placing the cursor back on the highlighted text.
When the white menu opens, select the highlighted A.
Change the color by selecting the color from the dropdown menu.

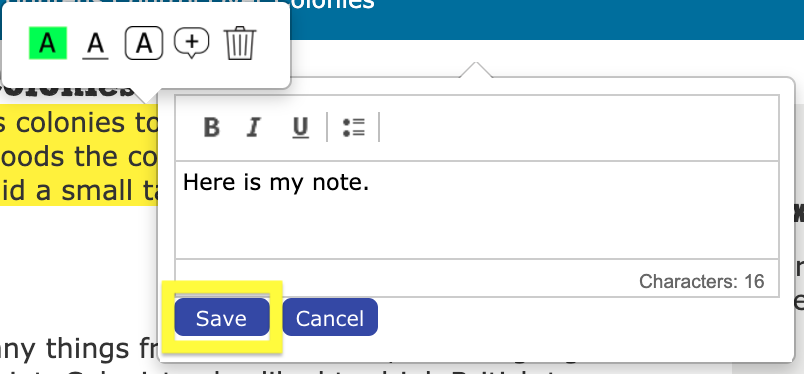
Adding a Note
Place the cursor on the highlighted text and when the white menu opens, click on the speech bubble with the plus (+).

When the note opens, type in text.
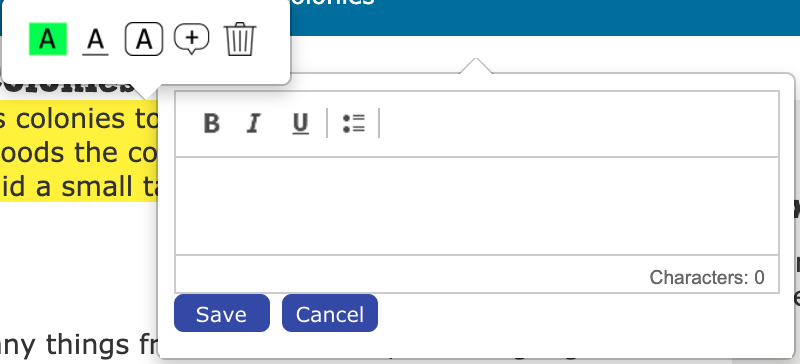
Click on Save.
To view a saved note, click on the black number in the text. This will cause the note to open. Users can then edit or delete.

To Delete a Highlight and/or Note
Place the cursor back on the note or highlight and select the trash can icon from the white menu.
